Translations;
Dotnet ve Vue.js uygulamasını Keycloak ile nasıl güvenliği sağlanır?How to Secure Dotnet & Vue.js Application with Keycloak
In this post, I will talk about how we can secure our dotnet and vue applications using keycloak.
First, we run our keycloak application using docker, if you publish this application using Azure or a similar cloud provider, you can easily use it in your production applications.
docker run -p 8080:8080 -e KEYCLOAK_ADMIN=admin -e KEYCLOAK_ADMIN_PASSWORD=admin quay.io/keycloak/keycloak:22.0.1 start-dev
After Keycloak is running, we create realm for our application from the left side after logging in from localhost:8080/admin with username: admin and password: admin. Since master realm is assigned to keycloak’s own use, we need to work on another realm.
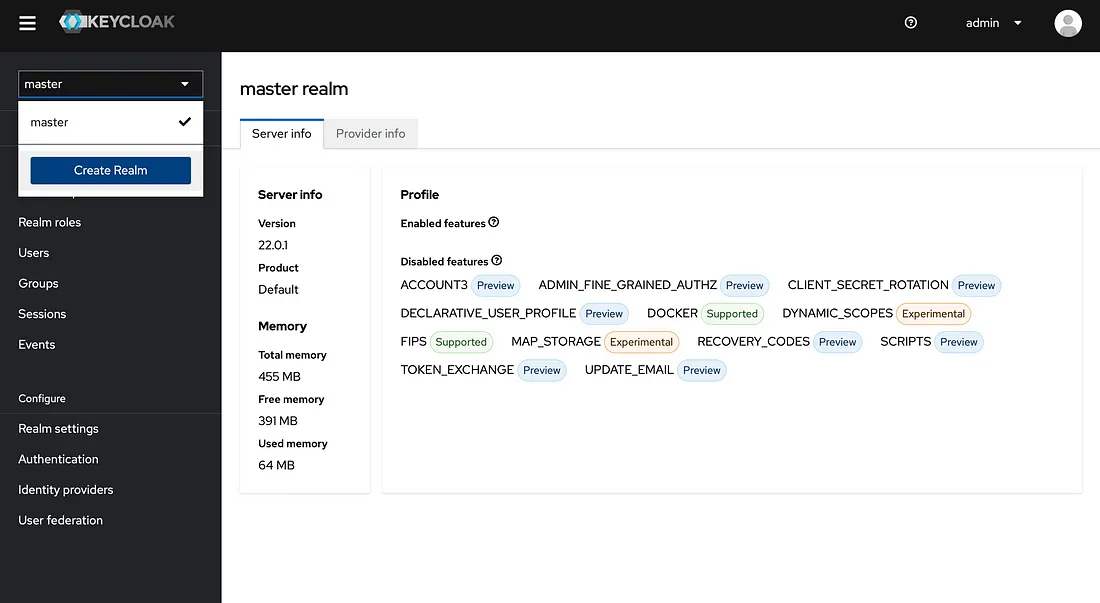
Create realm
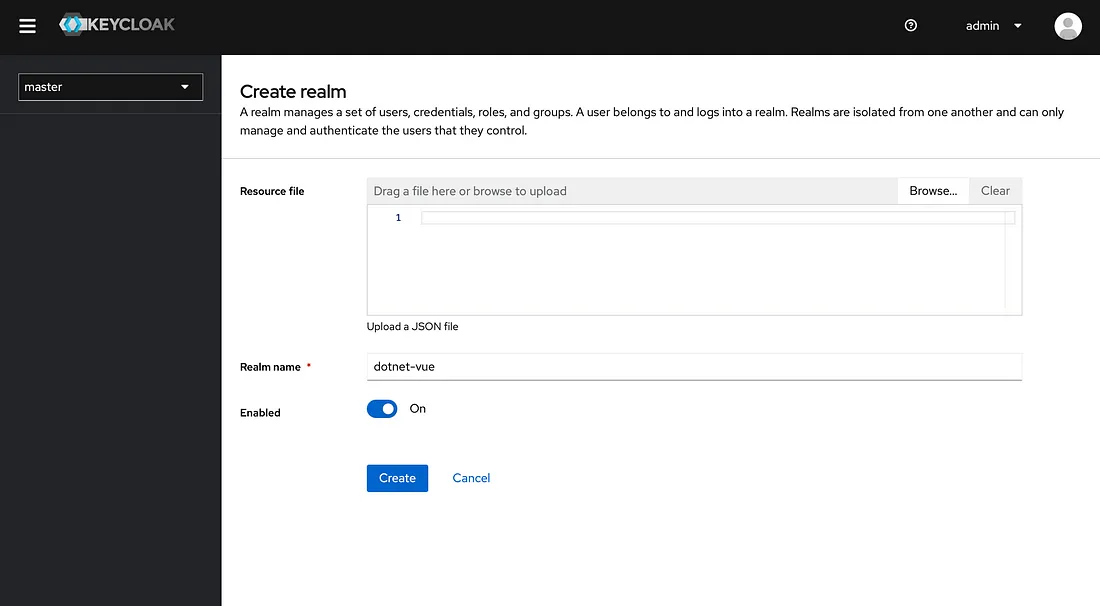
Create realm confirmation
After creating the realm, we create a client called vue from the client section. Our redirect urls are the url of our Vue app. You may need to make additional updates for production.
We can create users under dotnet-vue realm from the Users menu to be used in our vue application.
If we want to create a user for our application, we can enable our users to register with keycloak by turning on this option in realm settings.
Vue⌗
After completing these configurations, we are done with the keycloak admin panel, when an unauthorized request comes to our vue application, we have to redirect it to our keycloak login page. For this, we use the medium article Secure Vue.js app with Keycloak
We can create our Vue application using vite as follows, you can choose Vue and Javascript from the questions asked and continue.
npm create vite@latest vue
cd vue
npm install
npm run dev
Then we update the main.js content as follows. This script simply redirects the unauthorized requests to login and updates the token with the refresh token if the token expires with onTokenExpired. After this process, if we run the application with npm run dev and go to http://localhost:5173, the keycloak login url will be redirected. If we log in with the user information we have created, we will be logged into our system.
import { createApp } from "vue";
import "./style.css";
import App from "./App.vue";
import Keycloak from "keycloak-js";

let initOptions = {
  url: "http://localhost:8080",
  realm: "dotnet-vue",
  clientId: "vue",
  onLoad: "login-required",
};

let keycloak = new Keycloak(initOptions);

keycloak
  .init({ onLoad: initOptions.onLoad })
  .then((auth) => {
    if (!auth) {
      window.location.reload();
    } else {
      console.log("Authenticated");
    }

    createApp(App).mount("#app");
  })
  .catch((error) => {
    console.log(error);
    console.error("Authenticated Failed");
  });

keycloak.onTokenExpired = () => {
  console.log("Token expired");

  keycloak
  .updateToken(30 * 60)
  .then(() => {
    console.log("Token renewed");
  })
  .catch(() => {
    keycloak.login()
  })
}

export default keycloak;
Dotnet⌗
We can create a webapi project using Dotnet 6 as follows.
cd dotnet
dotnet new sln -n Secured
dotnet new webapi -o Secured.API
cd Secured.API
dotnet watch run
Thanks to the standards supported by Keycloak and Dotnet, we can only authorize with the configurations we will make in Program.cs without writing a special code. In this code, we verify where the token came from with the issuer, and thanks to IssuerSigningKey, we can verify the generated token without going to the keycloak.
RequireHttpsMetadata should only be used for development enviroment, if you have an application running in production enviroment you can delete this line and its value will evaluate to true.
builder.Services.AddSwaggerGen();

// ...

var issuer = builder.Configuration["Jwt:Issuer"];
var key = builder.Configuration["Jwt:Key"];
builder.Services.AddAuthentication(options =>
    {
        options.DefaultAuthenticateScheme = JwtBearerDefaults.AuthenticationScheme;
        options.DefaultChallengeScheme = JwtBearerDefaults.AuthenticationScheme;
    })
    .AddJwtBearer(o =>
    {
        o.Authority = issuer;
        o.RequireHttpsMetadata = false;
        o.TokenValidationParameters = new Microsoft.IdentityModel.Tokens.TokenValidationParameters
        {
            ValidateIssuer = true,
            ValidateAudience = false,
            ValidateLifetime = true,
            ValidateIssuerSigningKey = true,
            ValidIssuer = issuer,
            IssuerSigningKey = new SymmetricSecurityKey(Encoding.UTF8.GetBytes(key))
        };
    });

// ...

var app = builder.Build();

// ...

app.UseAuthentication();
app.UseAuthorization();

// ...

app.Run();
We can access it at builder.Configuration by keeping the data as below in the appsettings.json file. You can access the RSA256 key from the RSA256 Kid value in the Keys tab in the Realm settings menu under the relevant realm in the keycloak admin panel.
"Jwt": {
  "Issuer": "https://localhost:8080/realms/dotnet-vue",
  "Key": "secret-rsa-key"
},
Consuming Dotnet API from Vue app⌗
First we add CORS settings and Authorize attributes in our dotnet project. For this, we edit Program.cs as follows.
// ...

builder.Services.AddCors(options =>
{
    options.AddDefaultPolicy(
        policy => policy.WithOrigins("http://localhost:5137")
            .AllowAnyHeader()
            .AllowAnyMethod()
            .AllowAnyOrigin()
    );
});

// ...

var app = builder.Build();

// app.UseHttpsRedirection();

app.UseCors();
The WeatherForecastController.cs file provides security with the following attribute.
// ...

[Authorize]
public class WeatherForecastController : ControllerBase

// ...
Then, we install the axios library in our vue application with the following command.
npm install axios
After installation, we create a folder named services and make axios configurations in our file named base.api.js.
import axios from "axios";
import keycloak from "../main"

const http = axios.create({
  baseURL: "http://localhost:5050",
  headers: {
    "Content-Type": "application/json",
  },
});

http.interceptors.request.use(
  async (config) => {
    const token = localStorage.getItem("vue-token");
    config.headers = {
      Authorization: `Bearer ${keycloak.token}`,
      Accept: "application/json",
    };
    return config;
  },
  (error) => {
    Promise.reject(error);
  }
);

export default http;
To use the WeatherForecast endpoint, which is an example endpoint, we create the weather.api.js file in the same directory.
import axios from "./base.api";

export const getWeather = async () => {
    const response = await axios.get(`/WeatherForecast`);
    return response.data;
}
We display the data by making our API request in App.vue, here we can log out with the logout method.
<script>
import Keycloak from './main';
import { getWeather } from './service/weather.api';

export default {
  name: 'App',
  data() {
    return {
      weathers: []
    }
  },
  async mounted() {
    this.weathers = await getWeather();
  },
  methods: {
    logout() {
      Keycloak.logout();
    }
  },
}

</script>

<template>
  <button @click="logout" style="margin-bottom: 30px;">Logout</button>
  <table>
    <tr>
      <th>Date</th>
      <th>Summary</th>
    </tr>
    <tr v-for="weather in weathers">
      <td>{{ weather.date }}</td>
      <td>{{ weather.summary }}</td>
    </tr>
  </table>
</template>
If you want to access the source code, you can find the whole project on my GitHub account:
GitHub - berkslv/lecture-dotnet-vue-keycloak
Conclusion⌗
Thank you for reading! 🎉 In order not to miss my research in the field of software development, you can follow me at @berkslv.